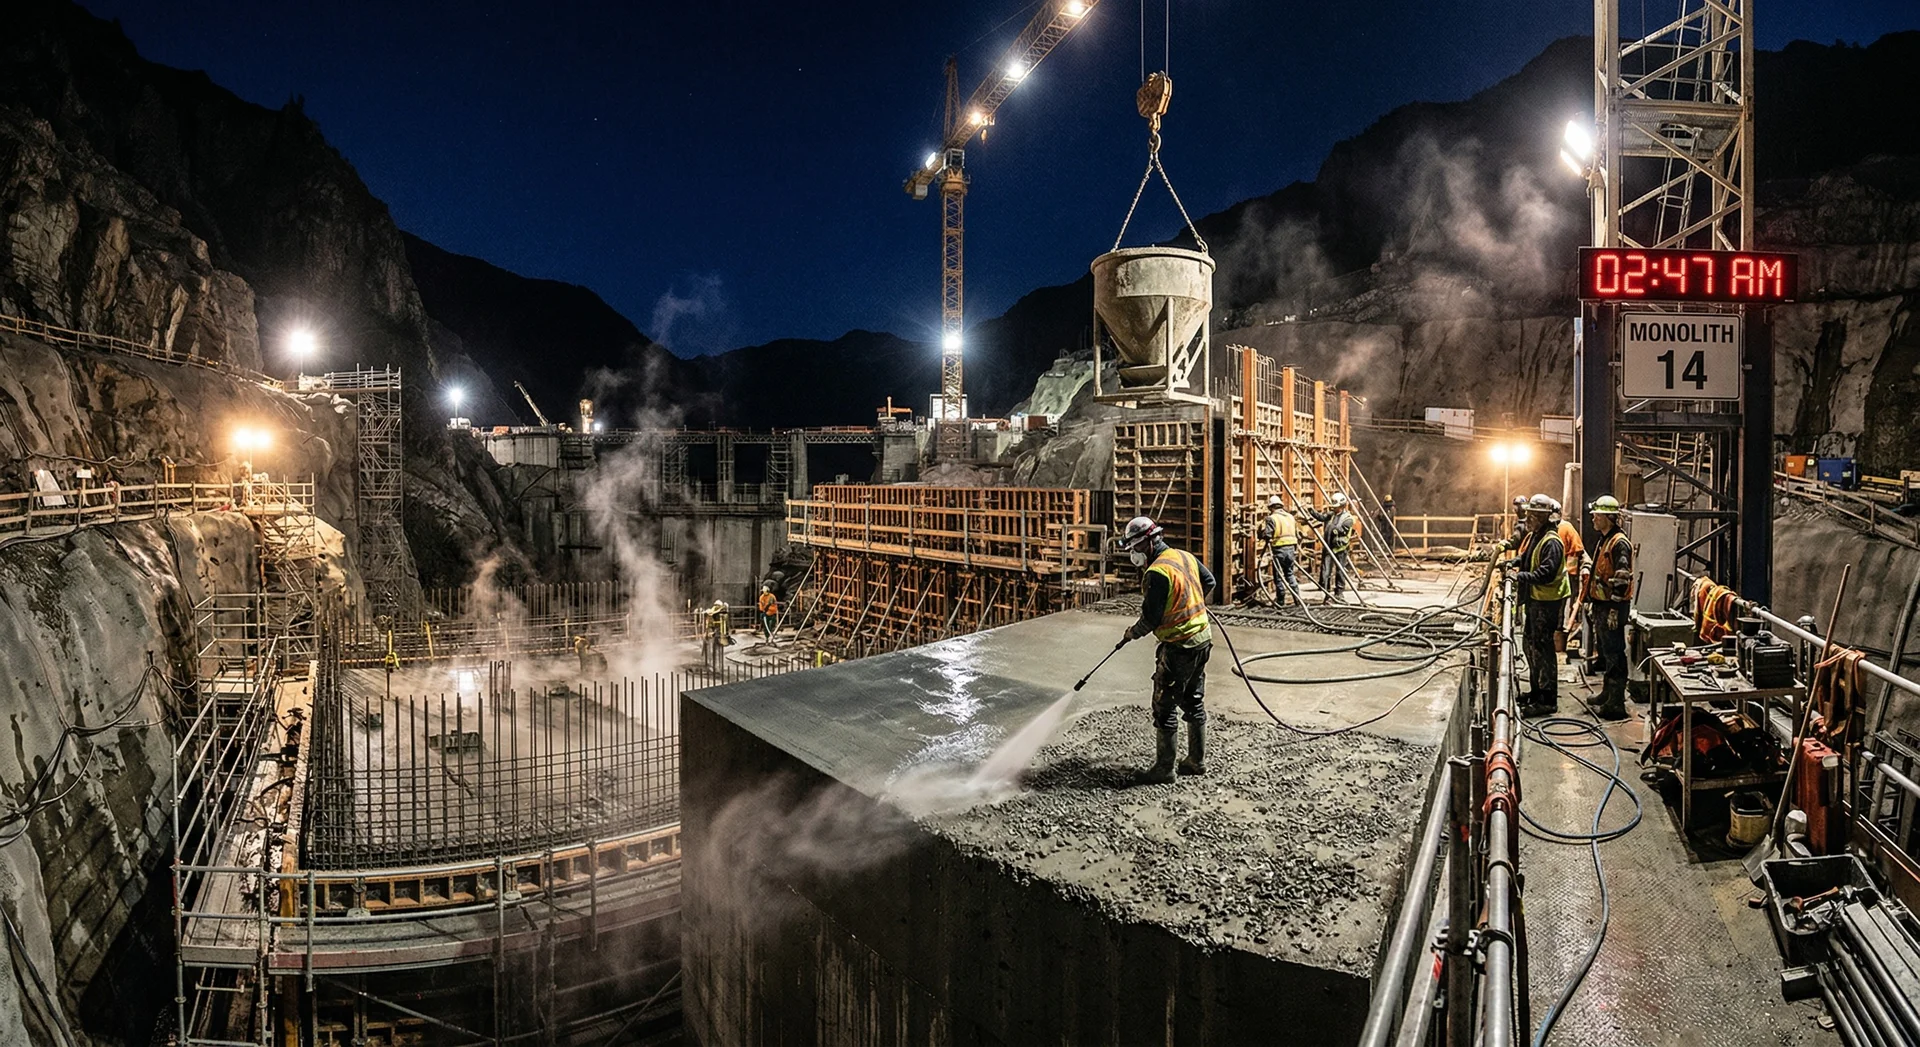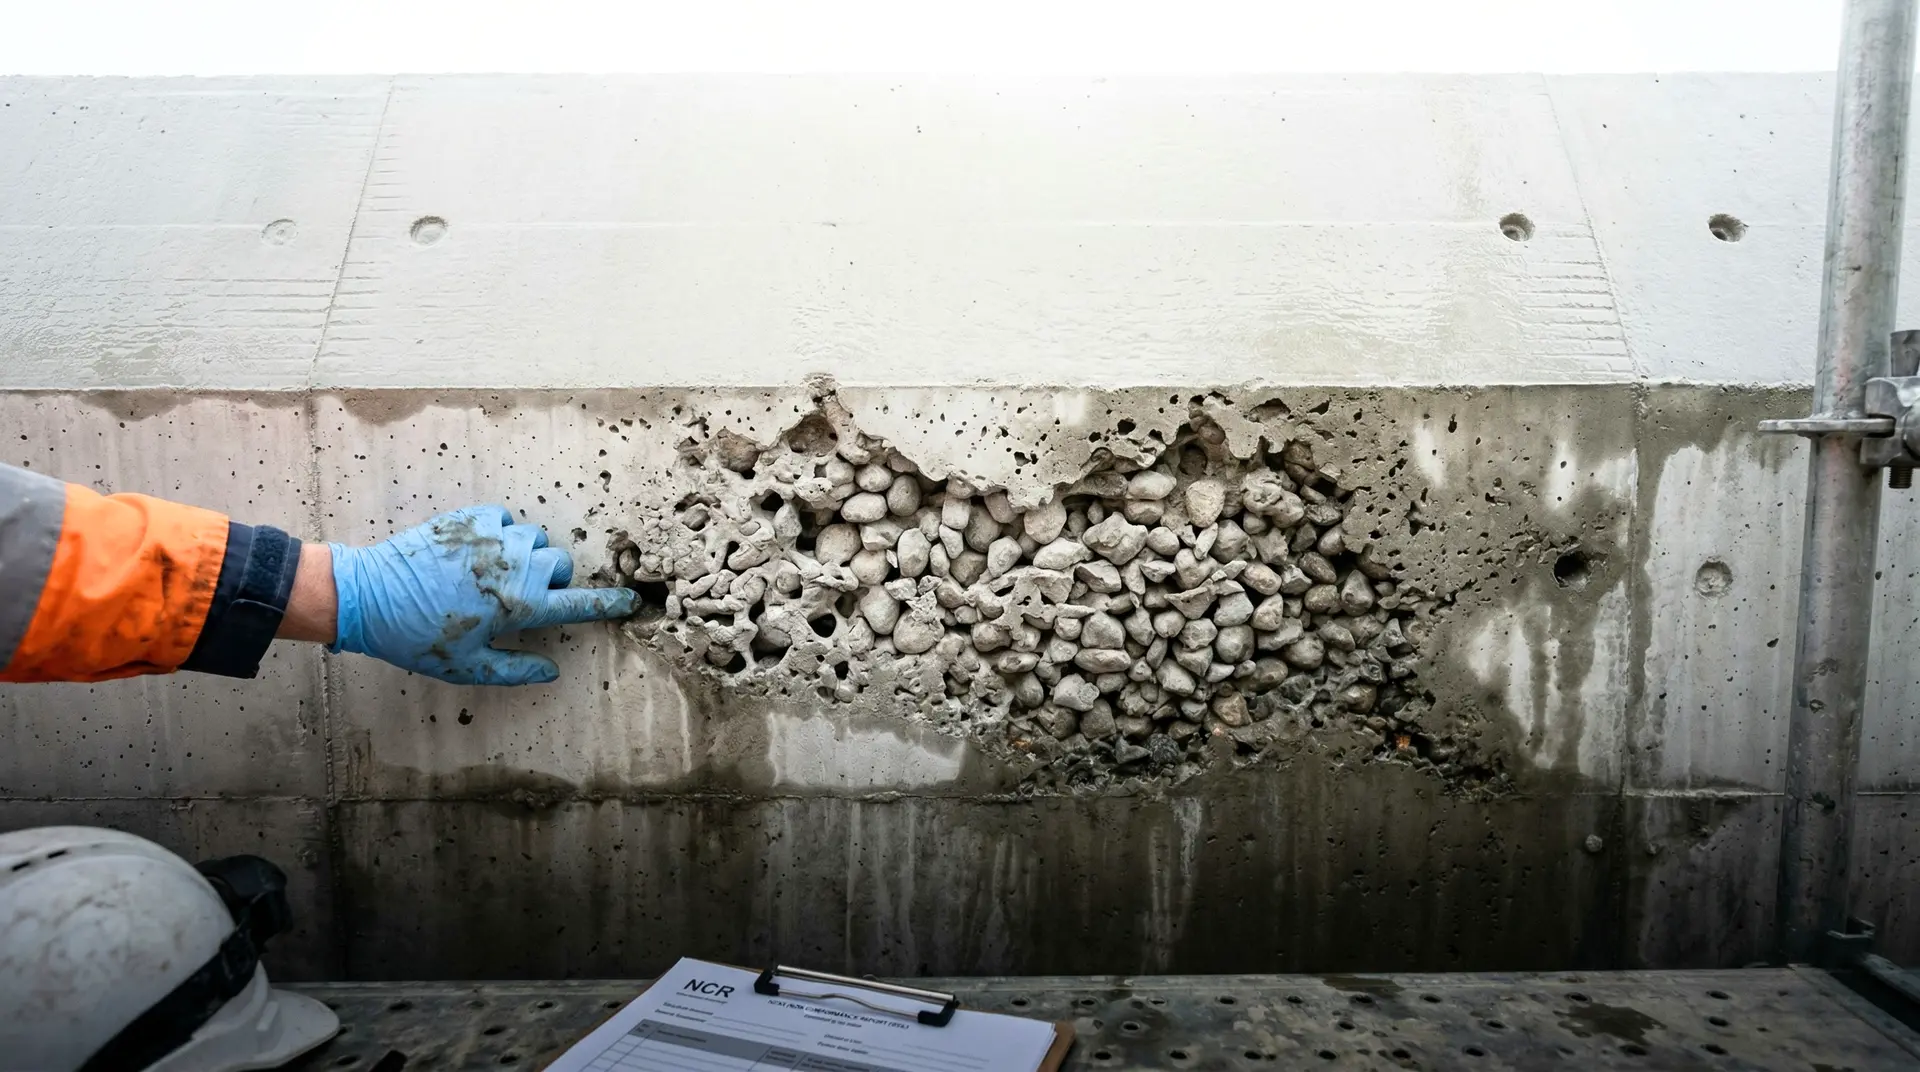
When the formwork comes off a freshly placed dam concrete lift and the surface reveals clusters of exposed aggregate with air voids between them, the site engineer faces an immediate decision: is this a surface blemish or a structural defect?
The answer is never obvious from the surface alone. A 100 mm patch of honeycombing might extend only 20 mm into the concrete, a quick mortar repair. Or it might extend 300 mm, indicating that the entire layer was improperly consolidated, requiring removal and replacement.
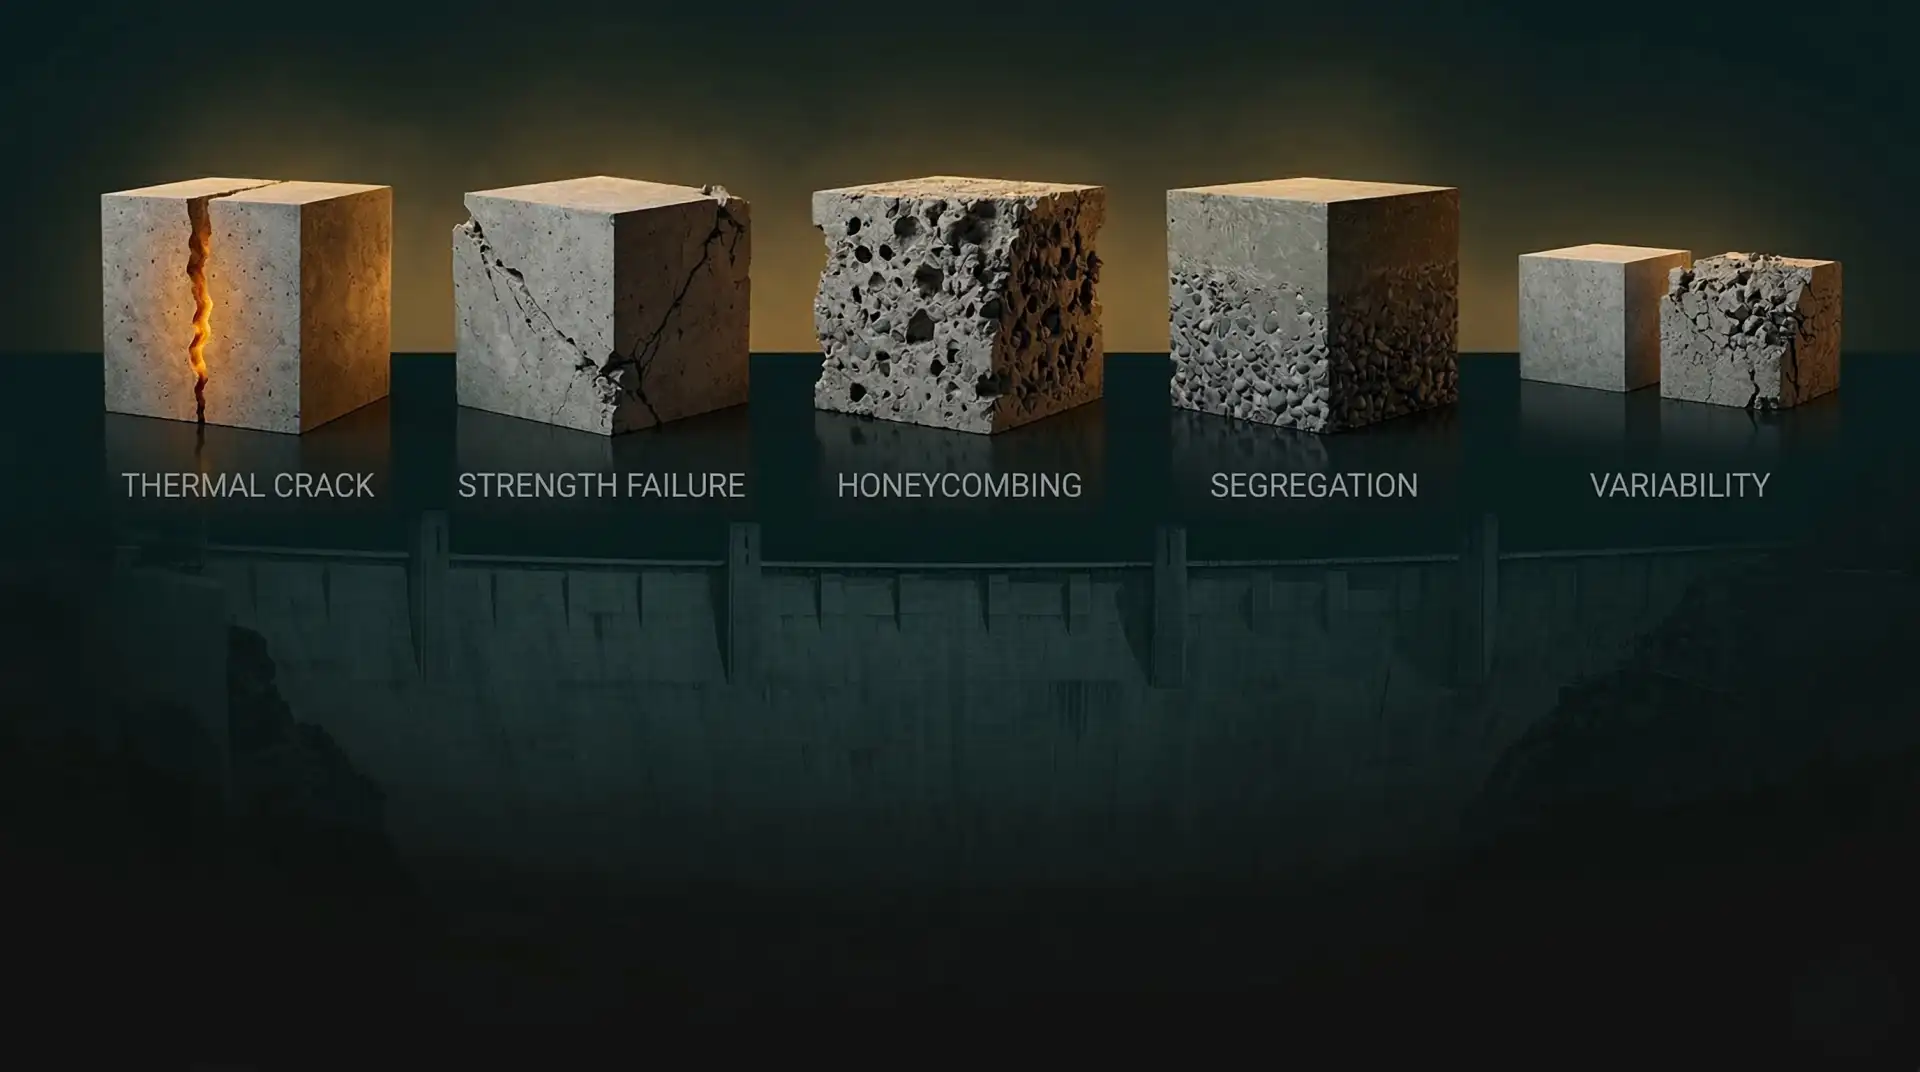
Honeycombing is one of the most common concrete quality problems in dam construction. It is also the most diagnostic. Its presence tells you something went wrong in the placement process. Its location tells you what went wrong. Its depth tells you how serious the consequences are.
What Honeycombing Is
Honeycombing occurs when the spaces between coarse aggregate particles are not filled by cement paste and fine aggregate (mortar). The result is a matrix of interlocking aggregate particles with air voids between them, resembling a honeycomb.
In sound concrete, the paste (cement + water + fine aggregate) fills every void between the coarse aggregate particles, creating a dense, continuous matrix with compressive strength, tensile capacity, and impermeability.
In honeycombed concrete, the aggregate particles are in contact with each other but the paste is absent or insufficient. This means:
- Zero tensile strength across the honeycomb zone (the aggregate particles have no bonding medium)
- Near-zero compressive strength in the affected area (load transfer through point-to-point aggregate contact, not through a continuous matrix)
- High permeability (the interconnected voids create an open pathway for water)
- No protection for reinforcement (if rebar passes through the honeycomb zone, it is exposed to air and moisture, initiating corrosion immediately)
The Six Causes
1. Inadequate Vibration
The most common cause. Immersion vibrators consolidate concrete by creating high-frequency oscillations that liquefy the paste, allowing it to flow around and between aggregate particles while air rises to the surface.
When vibration is inadequate, the paste remains in its as-placed position. Voids between aggregate particles persist.
Why it happens on dam sites:
- Vibrator spacing too wide (each vibrator has an effective radius of action, typically 200-400 mm depending on the vibrator type and concrete consistency)
- Vibration duration too short (operators rushing to keep up with placement rate)
- Vibrator not reaching the bottom of the lift (the vibrator must penetrate into the previous lift by 50-150 mm to consolidate the interface)
- Vibrator head worn or operating at reduced frequency (equipment maintenance neglected)
- Difficult access areas where the vibrator cannot reach (corners, around embedded items, near formwork faces)
2. Segregation During Placement
Segregation occurs when coarse aggregate separates from the mortar during transport and placement. The most common mechanism: free-falling concrete from height.
When concrete falls more than 1.5 metres, the coarse aggregate, being heavier, accelerates faster than the mortar. The aggregate arrives at the bottom of the form first, and the mortar arrives second, but not always in the same location. The result: zones of aggregate-rich, paste-poor concrete.
Why it happens on dam sites:
- Concrete discharged from buckets, conveyors, or transit mixers at heights exceeding 1.5 metres without tremie pipes or elephant trunks
- Concrete sliding down formwork faces or sloped surfaces, with aggregate rolling ahead of the mortar
- Long horizontal flow distances within the form (concrete pushed horizontally rather than placed vertically)
3. Mix Design Issues
If the concrete mix does not contain enough paste to fill the voids between the aggregate particles, honeycombing is inherent in the material, not just a placement problem.
Contributing factors:
- Aggregate grading with gap-graded size distribution (missing intermediate sizes creates larger voids)
- Insufficient cement and fine aggregate content relative to the coarse aggregate volume
- Low workability mixes placed in congested areas where flow is needed
4. Obstructed Flow
In dam construction, concrete must flow around embedded items, waterstops, reinforcement cages, cooling pipes, and instrumentation. Any location where concrete cannot reach and be vibrated will honeycomb.
Common obstruction points:
- Behind waterstops at contraction and monolith joints
- Around dense reinforcement in gallery roofs and spillway piers
- Below embedded steel plates and anchor bolts
- Around instrumentation conduits and cooling pipes
- In corners and re-entrant angles of complex formwork
5. Overvibration (Segregation by Settlement)
The opposite of inadequate vibration, and equally damaging. When immersion vibrators are left in the concrete too long or operated at excessive amplitude, the heavier coarse aggregate settles downward while the lighter cement paste and mortar migrate upward. The surface develops a thick layer of slurry or laitance. The zones below become aggregate-rich and paste-poor: honeycombing caused by too much vibration, not too little.
Why it happens on dam sites:
- Operators assume “more vibration = better consolidation” and leave the vibrator in each insertion point far longer than necessary
- High-frequency external vibrators on formwork operated continuously rather than in controlled cycles
- Re-vibration of concrete that has already been adequately consolidated during a previous pass
- Vibration of very high-slump or superplasticised mixes that are already self-levelling
The diagnostic signature: If the formed surface shows excess laitance or a smooth paste-rich layer on top, and honeycombing or aggregate nests in the lower portion of the same lift, overvibration is the likely cause. This pattern is the inverse of inadequate vibration, where honeycombing appears at the surface near the formwork face.
6. Premature Form Removal
If formwork is removed before the concrete has gained sufficient strength to support itself, the outer surface can slough away, exposing aggregate. This is not strictly honeycombing (the concrete was consolidated when placed) but appears identical on the surface.
Location Tells the Story
The location of honeycombing on a dam reveals the cause:
At the base of a lift: Segregation from free fall. Concrete was dropped from too high without adequate chuting.
Along the formwork face: Inadequate vibration near the form. The vibrator did not reach close enough to the formwork to consolidate the concrete against it.
Around embedded items (waterstops, pipes, reinforcement): Obstructed flow. Concrete could not reach all sides of the embedded item, and the vibrator could not access the area.
At lift joints (horizontal construction joints): The vibrator did not penetrate adequately into the previous lift. The interface zone was not consolidated. This is closely related to the mechanisms behind cold joint formation in mass concrete dams.
At the bottom of a lift with excess laitance on top: Overvibration. The vibrator was left in too long, causing aggregate to settle and paste to rise. The surface looks deceptively smooth and paste-rich, but the lower portion of the lift is aggregate-rich and poorly bonded.
Random patches in the middle of a lift: Possible vibrator skip (an area the operator missed) or a batch of concrete with abnormal workability (too stiff to flow and consolidate).
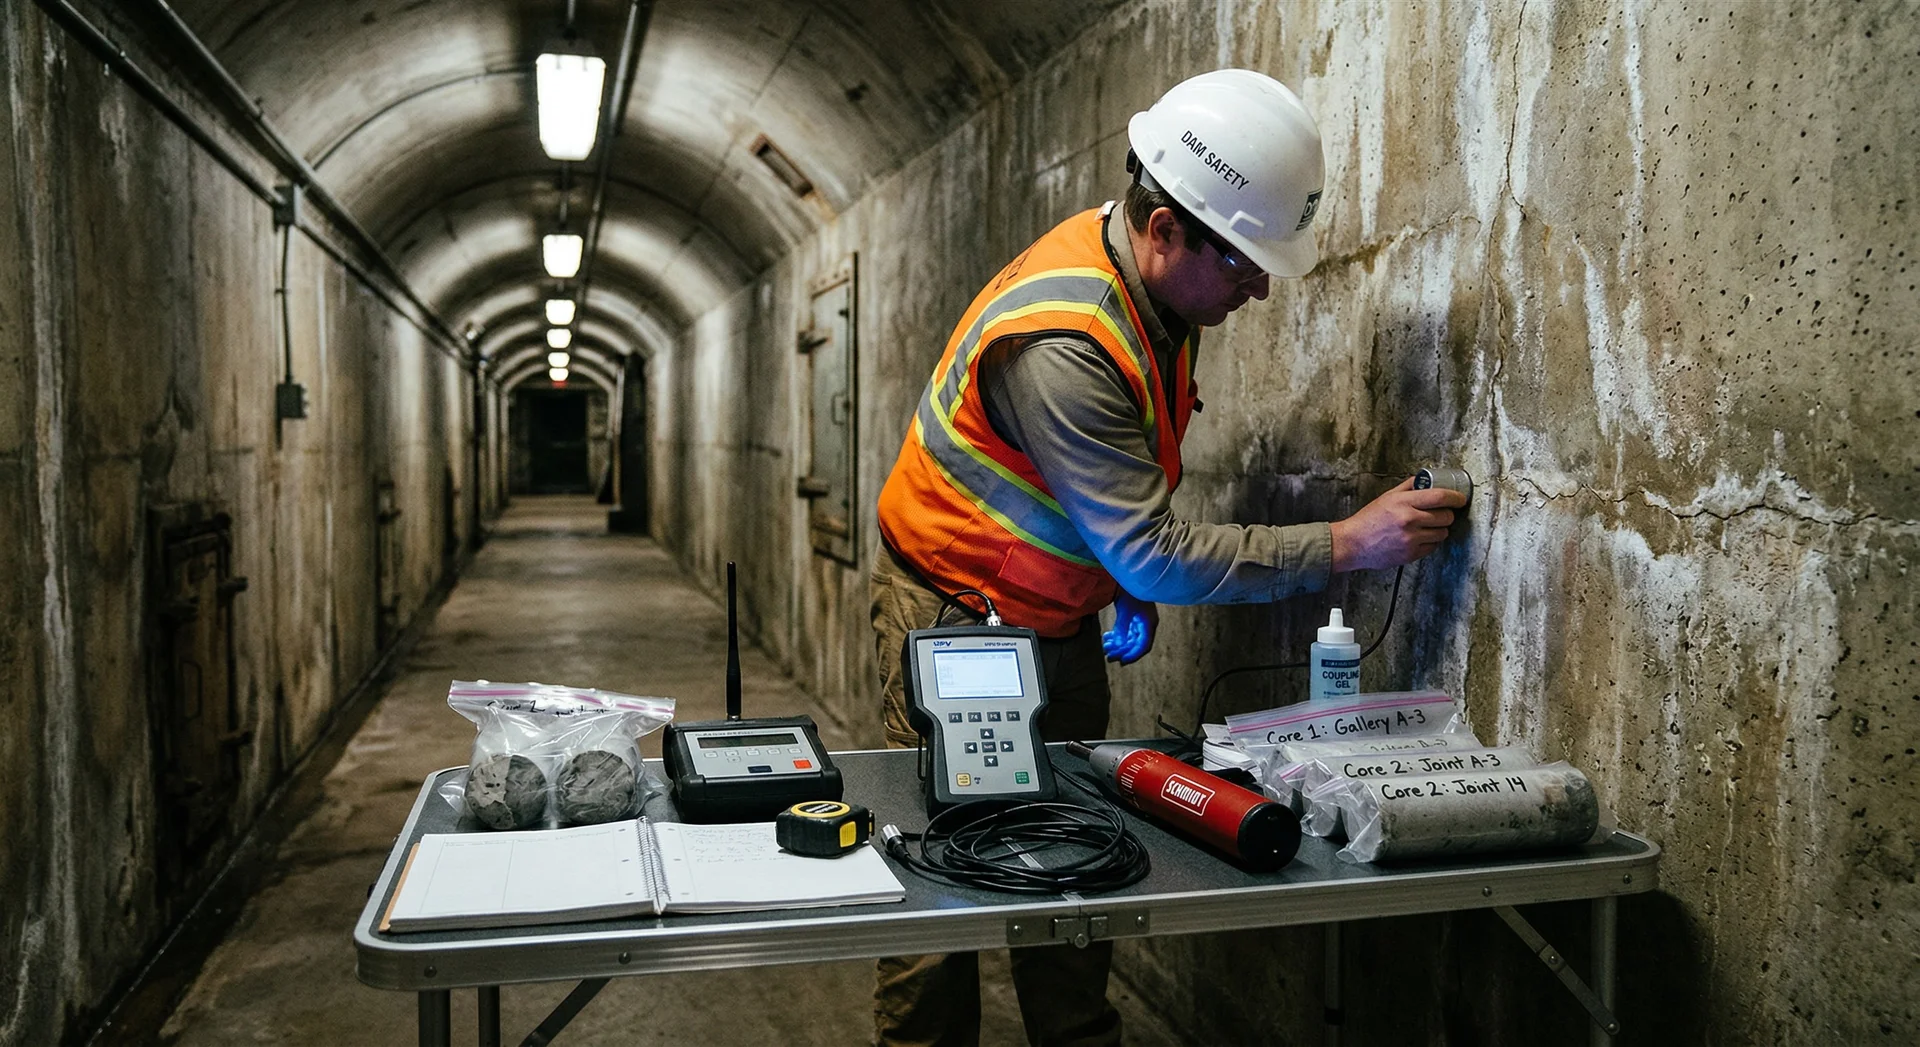
Investigation: Determining the Depth
Surface inspection identifies honeycombing. Investigation determines its structural significance.
Hammer Sounding
Tapping the surface with a hammer and listening for the response. Sound concrete returns a sharp, high-pitched ring. Honeycombed or voided concrete returns a dull, hollow thud. The transition between sound and hollow indicates the boundary of the defect.
Limitations: Qualitative, operator-dependent, and limited to depths the hammer energy can reach (approximately 100-200 mm).
Ultrasonic Pulse Velocity (UPV)
IS 13311 Part 1 prescribes UPV testing for assessing concrete quality. UPV is one of several NDT methods used to evaluate dam concrete. Velocity below 3.0 km/s indicates “doubtful” quality. By mapping UPV across the honeycomb area and comparing with adjacent sound concrete, the extent and severity of the defect can be quantified.
Impact Echo
Provides the most precise depth measurement of the defect zone. The reflected stress wave frequency identifies the depth at which the concrete transitions from voided to sound.
Core Extraction
The definitive method. A core drilled through the honeycomb area provides direct visual evidence of the defect depth and the condition of the concrete behind it. The core can be tested for compressive strength to determine the residual capacity of the section.
The investigation must be completed before repair starts. Patching the surface without knowing the depth of the defect is the most common error in honeycomb repair. It creates a cosmetic fix over a structural problem.
Repair: Matching the Method to the Defect
Surface Honeycombing (less than 50 mm deep, limited area)
- Remove all loose aggregate and weak material by hand or with light mechanical tools
- Clean the cavity with water jet and compressed air
- Dampen the surface to saturated surface-dry condition
- Apply cement-sand mortar (1:2 or 1:3 ratio) or polymer-modified repair mortar
- Cure for minimum 7 days under wet cover
Moderate Honeycombing (50-150 mm deep)
- Cut back all defective concrete to sound material using a chipping hammer or saw
- Clean the cavity thoroughly
- Apply a bonding agent (cement slurry or proprietary bonding compound) to the prepared surface
- Pack dry-pack mortar (a stiff, low-water cement-sand mix) firmly into the cavity in layers
- For larger cavities, use a low-slump repair concrete (10-15 mm maximum aggregate size) placed against temporary formwork
- Cure for minimum 14 days
Deep Honeycombing (more than 150 mm)
- Remove all defective concrete to sound material. The removal boundary should extend at least 50 mm beyond the visible edge of the honeycomb.
- Prepare the cavity with clean, perpendicular edges (no feathered edges, which debond)
- Install formwork if necessary
- Apply bonding treatment to all prepared surfaces
- Place structural repair concrete matching the original mix design properties (compressive strength, elastic modulus, thermal coefficient)
- Vibrate thoroughly
- Cure for minimum 28 days
- Test the repair (UPV, core if required) to verify bond and quality
When to Remove and Replace
Some honeycombing is beyond repair:
- Defects extending through more than 50% of the section thickness
- Honeycombing in critical structural zones (upstream face at reservoir level, gallery roof, spillway ogee)
- Honeycombing around reinforcement where corrosion has already initiated
- Areas where UPV testing shows the surrounding “sound” concrete is also of questionable quality (indicating a systemic problem, not an isolated defect)
In these cases, the affected concrete must be removed and replaced. This is expensive and time-consuming, but it is the only option that restores the section to its design capacity.
Prevention: The Only Real Solution
Repairing honeycombing is always more expensive and less reliable than preventing it. The prevention programme for dam concrete:
Mix Design
- Adequate paste volume to fill inter-aggregate voids (minimum 28-32% paste by volume)
- Well-graded aggregate conforming to the specified grading envelope with no gap grading
- Workability sufficient for the placement method and section geometry (higher slump for congested areas)
Placement
- Maximum free-fall height: 1.5 metres. Use tremie pipes, elephant trunks, or drop chutes for deeper placements.
- Place concrete in horizontal layers, not in sloped piles
- Do not push concrete horizontally more than 1-2 metres from the point of deposit
Vibration
- Immersion vibrators at maximum spacing of 1.5 times the radius of action (typically 300-600 mm centre-to-centre)
- Vibration duration: until air bubbles cease rising to the surface (typically 10-30 seconds per insertion)
- Penetrate the vibrator 50-150 mm into the previous lift to consolidate the interface
- Extra vibration passes along formwork faces, around embedded items, and in corners
Formwork
- Design formwork to allow vibrator access to all areas
- Provide vibrator ports or access windows in congested areas
- Formwork tightness prevents paste leakage (paste loss through gaps creates localised honeycombing)
QC Inspection
- Inspect every formed surface within 4 hours of formwork removal
- Photograph and classify all honeycombing (location, area, estimated depth)
- Conduct sounding or UPV on any honeycombing larger than 200 mm in any dimension
- Maintain a honeycomb register with location, cause analysis, repair method, and repair verification
The honeycomb register is valuable beyond the immediate repair. Over the course of a dam project, it reveals patterns: if most honeycombing occurs at the base of lifts, the free-fall height is the problem. If it occurs along one formwork face, the vibration team on that side is underperforming. If it occurs around waterstops, the embedded item installation method needs revision.
Honeycombing is a message from the concrete. The engineering response is not just to repair the defect but to read the message and fix the process that created it. Systematic construction troubleshooting turns individual defects into process improvements that prevent recurrence across the entire project.